Quick Guide: Dockets – Adding to an Existing Docket
To add Documents to an existing Docket –
- Locate the Docket number you want to add to.
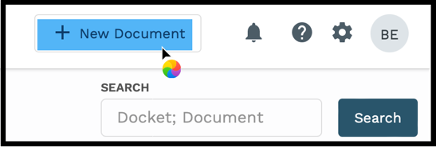
- Click the New Document button next to the user’s initials on the top right of the screen.
Step One – Document Details
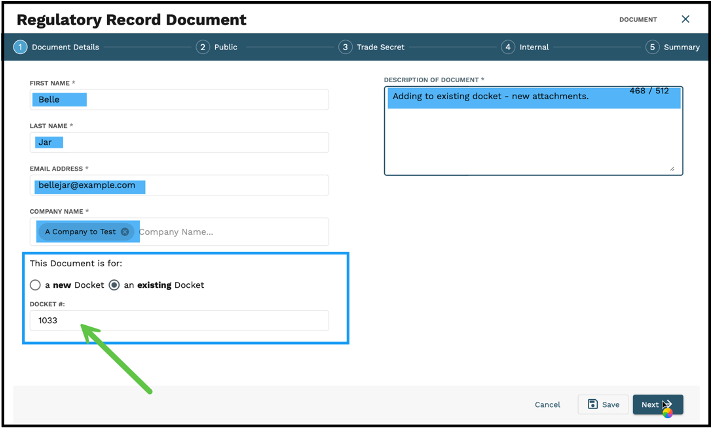
- Enter the First Name, Last Name, and Email Address of the individual creating the Document.
- Enter Company Name
- If the name is already in the system, it will auto populate upon typing.
- The user can enter more than one Company Name.
- Select “Existing Docket” and type in the existing Docket number.
- Enter Description of Document in freeform field.
- Data entered into this field can be found using the “Description” filter at a later point.
- Click Next
- The user also has the option to click “Save” – the Document will be listed on the user’s Dashboard under the “Pending” filter until further action is taken.
Step Two – Public
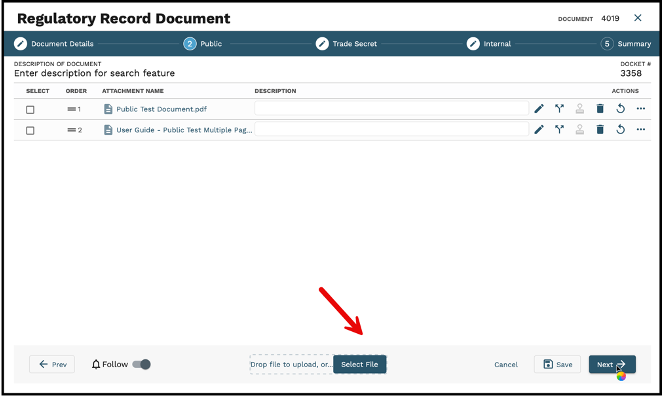
- Click “Select File” or Drag and Drop to upload any Public attachments
- Click “Next” to continue
Step Three – Trade Secret
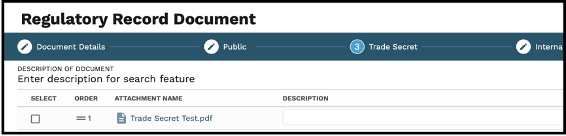
- Click “Select File” to upload any Trade Secret attachments
- Click “Next” to continue
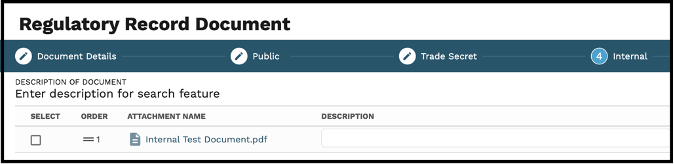
Step Four – Internal
- Click “Select File” to upload any Internal document attachments
- Click “Next” to continue
Step Five – Summary
The Summary screen is where the user can access all information input in the Regulatory Record Document wizard, as well as the History of the Document.
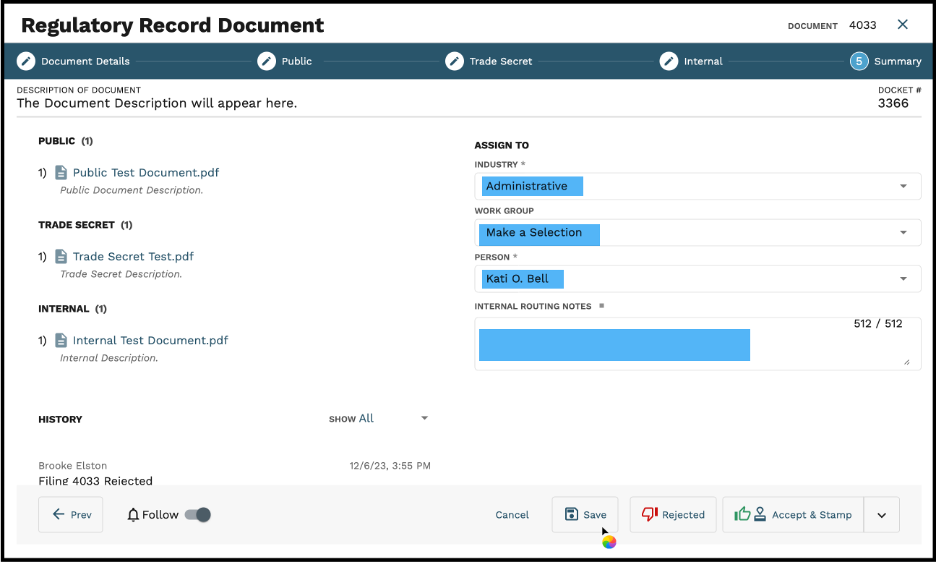
To Assign the Document for further review:
- Select Industry dropdown to choose from the following options: Administrative, Agents and Agency Licensing,Electric, Gas, GUFPA, Insurance Product Regulation, Legal, Power and Safety Fire.
- If utilizing the Work Group feature in your workflow, select accordingly. Otherwise, keep the Make a Selection default setting.
- Select Person you wish to route the Document to from the dropdown.
- Enter any Internal Routing Notes into the freeform field provided.
- Click Save
The document will then be routed to the assigned Person for further action & Administration will need to stamp/approve.