User Management
GovLink provides the tools to create new users and manage the settings for existing users:
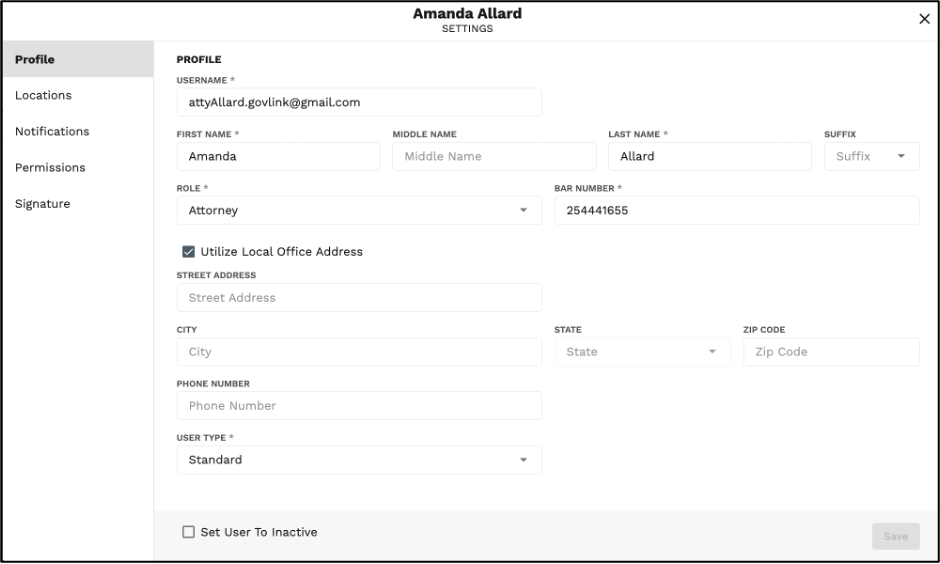
- Profile (username, name, role, bar number, address and phone number)
- Role (e.g.,attorney, case worker, legal assistant)
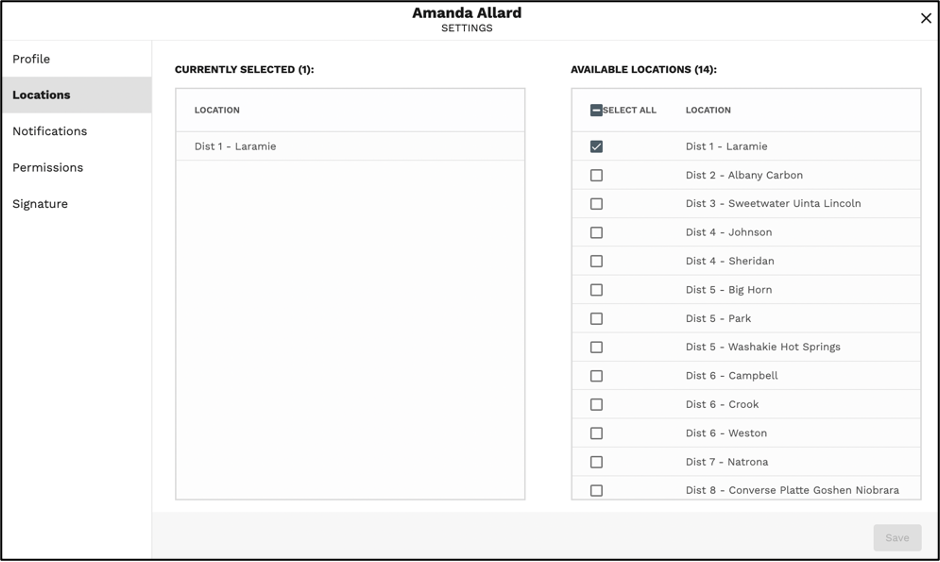
- Local Office(s)
- Notifications (filing status change, court updates, filing assignment change)
- Permissions (delete filinigs, sign, add users and edit users)
- Signature (upload a signature file for users with Signing permission)
Layout
For each user who has permissions to add or edit user accounts, a gray gear icon appears to the left of the user’s initials.
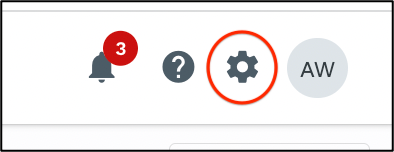
- Click the gear, then click “User Management.”
- The User Management page displays a list of all users who are associated with the given location. Find a specific user or group of users by searching with any combination of NAME, LOCATION and ROLE.
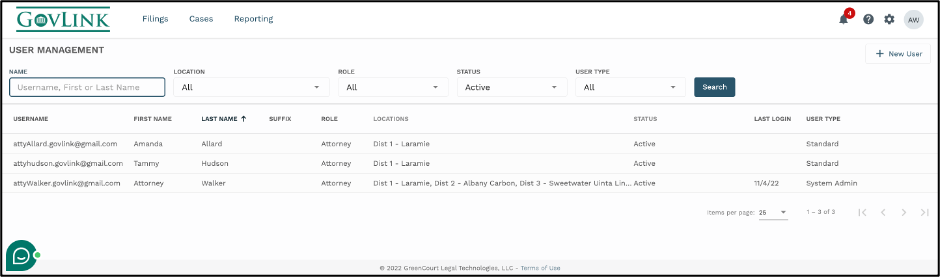
Edit a User
To edit a user, click the row containing the user’s name to open that user’s Settings page.
PROFILE captures required information (username, first name, last name, role and bar number) and optional information (middle name, suffix, street address, city, state, zip code and phone number). Please note that for user role of ‘Attorney’, both a Bar number and an address selection are required. An address may be entered for the Attorney, or check the Utilize Local Office Address to use the filing office’s address for the attorney.
LOCATIONS captures the locations that are associated with the user. Add or remove a location by checking or unchecking the corresponding box.
NOTIFICATIONS controls the flow of email alerts for events tracked within the system. Toggle each type of notification (filing status change, court updates, filing assignment change).

PERMISSIONS – ADMIN:
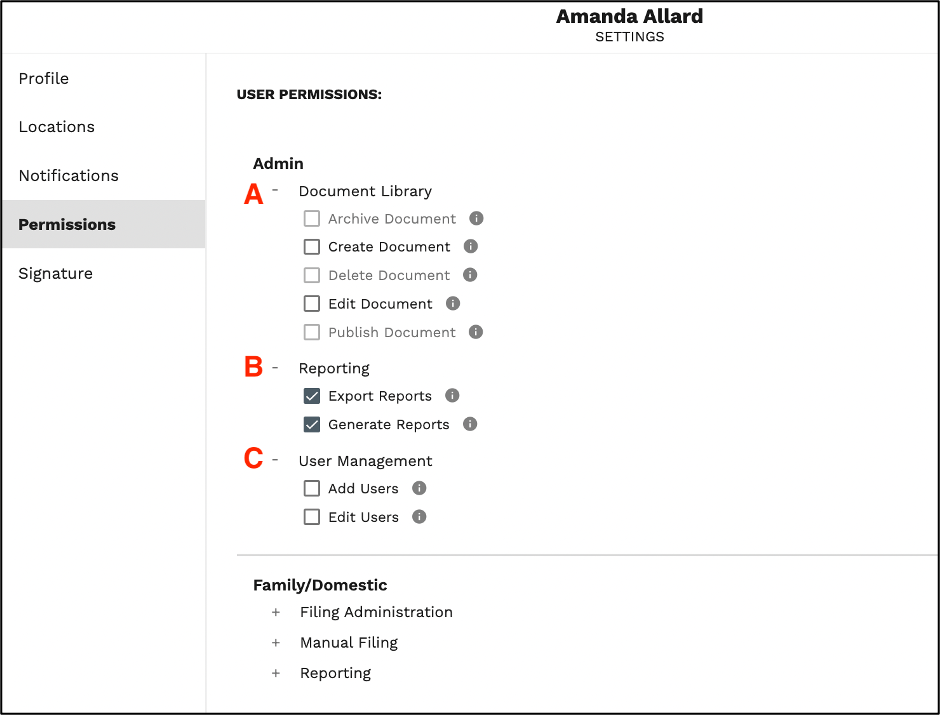
- A. DOCUMENT LIBRARY: Once a user has clicked both Create Document and Edit Document, all other document library permissions will become clickable.
- B. REPORTING: User will not see the reporting option at the top of their dashboard if they don’t have reporting permissions.
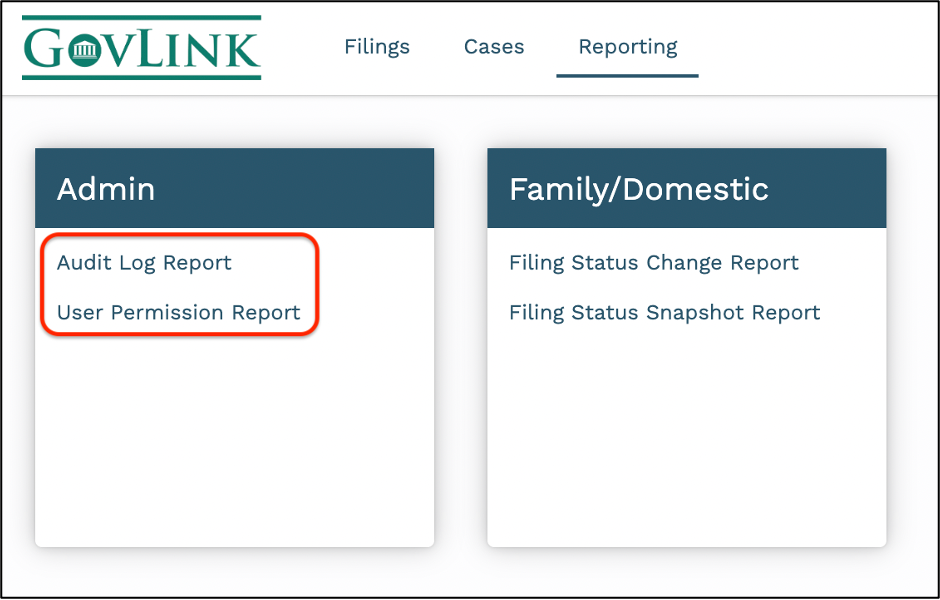
- Generate Reports: Gives users the ability to create Audit Log Report and/or User Permission Report.
- Export Reports: Gives users the ability to export the generated admin reports into an excel file.
- C. User Management:
- Add Users: This permission gives the user the ability to create new users in GovLink.
- Edit Users: This permission gives the user the ability to edit permissions for existing GovLink users.
PERMISSIONS – FAMILY/DOMESTIC:
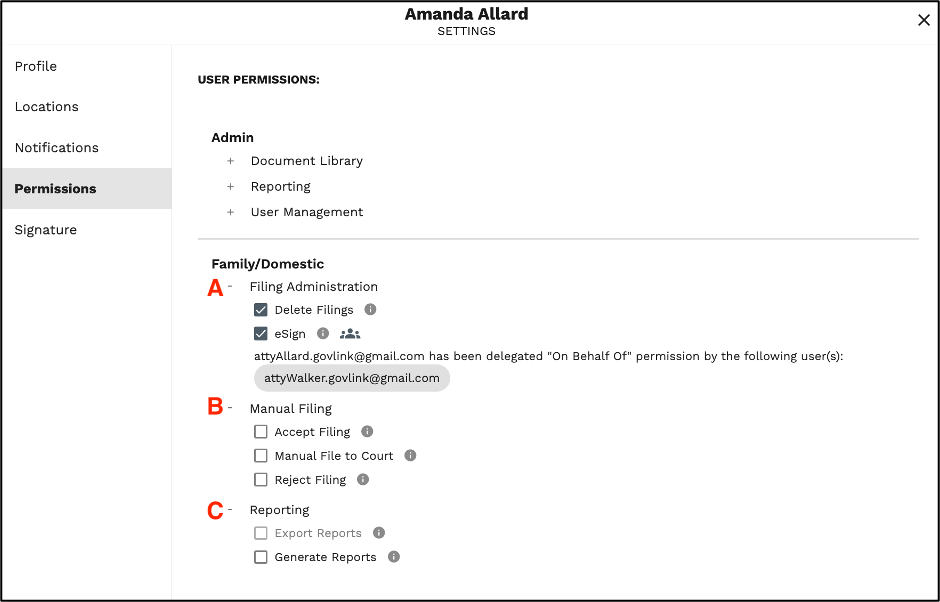
- A. Filing Administration:
- Delete Filings: All users have the ability to delete filings they created themselves, as long as the filing is in ‘Unfiled’ or ‘Rejected’ status. This permission enables users to also delete ‘Unfiled’ or ‘Rejected’ filings created by other users.
- eSign: This permission gives the user the ability to insert a signature image into a document. This permission is only given to Attorneys unless there is a special circumstance approved by leadership.
- B. Manual Filing:
- Accept Filing: Allows user to manually accept filings that are manually submitted.
- Manual File to Court: This permission gives the user the ability to download and manually file with the appropriate court at locations. This permission is only given to Attorneys unless there is a special circumstance approved by the admin.
- Reject Filing: Allows user to manually Reject filings that are manually submitted.
- C. Reporting: User will not see the reporting option at the top of their dashboard if they don’t have reporting permissions.
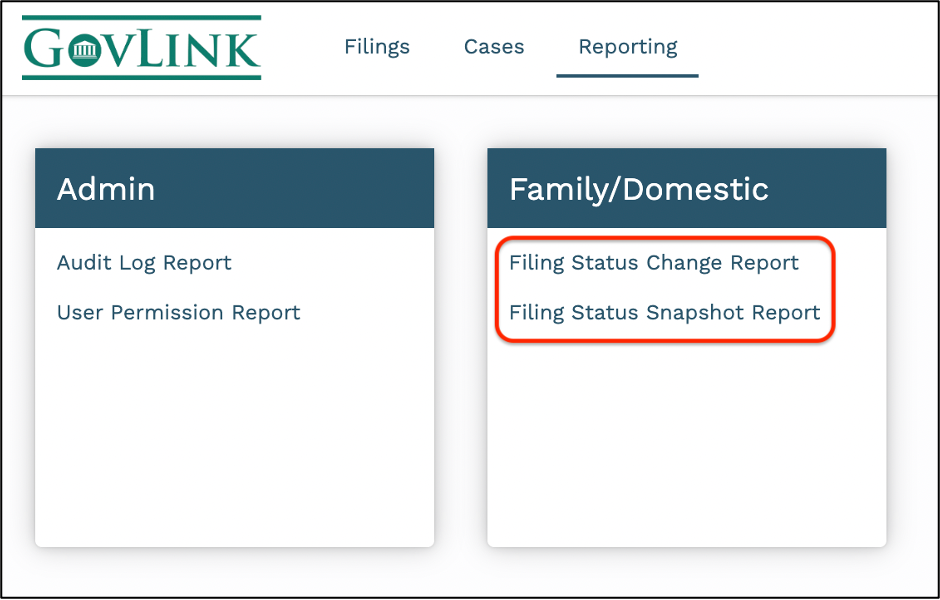
- Generate Reports: Gives users the ability to create Filing Status Change Report and/or Filing Status Snapshot Report.
- Export Reports: Gives users the ability to export the generated Family/Domestic reports into an excel file.
On the Profile and Locations tabs, click “Save” to store changes.
Notifications & Permissions tabs will auto-save.
To close the window, click the “X” in the top right corner.
Create a New User
To add a new user that does not yet appear in GovLink:
- To add a new user, click “New User”

- Complete the required information on the Profile tab.
- The email address must be unique in order to create the new user.
- Click “Save” to create the new user and trigger an email notification to the new user.
- Proceed to the Locations, Notifications and Permissions tabs. Don’t forget to SAVE when prompted.
- To close the window, click the “X” in the top right corner.